Marching into March

by Florence B.

Wow, time sure is flying by fast! How is it March already? Well, if you haven’t registered for a spot for the 2018-2019 school year, make sure you reserve your spot soon! Registration is now open for everyone, so please let your friends know it’s time to get excited about getting a spot for one of next year’s classes!

By now, I’m sure everyone has seen the amazing dramatic play area (and if you haven’t, don’t worry, I have some pictures)! Ok, let’s just say that the curriculum team deserves a medal for all their designs, and this one is definitely one of my favorites! Ready to fly the open skies? Welcome to the BFCP Airport! Where should we go today?

March_01_01.jpeg

The pictures don’t do justice to how cute this set up is! I love all the little details that the curriculum team included. There are little luggage tags on the luggage, a pet carrier to take a pet on the flight, and a metal detector that actually swings so the kiddos can put it where they want for just a few examples! I got a huge kick out of the flight control panel. Did you notice the calculators attached to the wall?! How can you not fall in luuuurve with this setup?! Oh, and I have another reason for you as to why being part of a Co-Op is awesome—the 3/4 and PreK classes got to meet an Alaskan Airlines pilot and hear about his job! How are Co-Ops and pilots connected? Well, that awesome AA pilot is also one of our awesome PreK dads!

You’ll also see plenty of “Things that Go” books along with plenty of flying in the sky books, but let’s give a special call out to our author of the month: Donald Crews! My kids absolutely love his Freight Train book, which is also one of the 1979 Caldecott Honors books. That’s right, 1979! I guess it’s pretty timeless since kids still love this book almost 40 years later (and since it still hits top lists like New York Public Library’s “100 Great Children’s Books | 100 Years” at https://www.nypl.org/childrens100, I guess adults love this book, too!)? Anyway, it’s hard to describe this simple book, so just check it (and the rest of Donald Crew’s books) out, and be amazed when your kiddo is highly entertained by it!

March_01_02.JPG

Other themes you’ll see during March are Jobs that People Do, Wind and Weather, and Rainbows! The rainbow one will be sooo much fun since this is also interactive! The 3/4 and PreK classes will be “eating the rainbow” during the week of March 12th! Kiddos will bring one piece of whole fruit to share with the class, and then the PreK class will go even further by creating a graph of all the different fruits brought to class (go go early math!). On March 14th, it’ll be rainbow day for the older 2 classes, which means wearing rainbow colors to school! On March 16, the 2/3 class will have “Green Day,” so don’t forget to wear something green to school!

Well, I talked about the rainbow and the color green, how about the color red?! As in Fire Station red!! I’m so excited for this: this month, the toddlers and 2/3 classes are going to…wait for it…wait for it… are you ready for it…FIRE STATION 51 in Kenmore!!! Oh, there are just not enough exclamation marks in the world for this excursion!

*Phew* well, we have so may wonderful things going on during school, how about after school for our evening parent ed? On March 21, get ready for our our PAC All Schools Speaker: Julietta Skoog! This will be held in the Shoreline Community College Theater, and she’ll discuss Positive Discipline! You can check her out at her website here.

Here’s a quick quote from her website: “Learn to discipline with firmness and kindness, have fun as a parent, and set the foundation for important social and life skills.”

Well, I hope you’re enjoying March so far and looking forward to some fun and interesting topics ahead for you! If you have any feedback or thoughts to share, feel free to comment below or email me at blog@bothellfamilycoop.org!
Kitchen Science

by Florence B.

We’re half-way through the mid-winter break, and I hope you’re having fun trying new things and revisiting the old ones! For this mid-month blog post, I decided to do kind of a second part to my mid-Nov blog post “Playing with Your Food” and continue with “Kitchen Science!” Let’s face it, whenever educators talk about STEM, high-level science experiments, computer science activities, and other other high-level engineering topics are probably the first things that come to mind. Well, STEM fun at home doesn’t have to be all about expensive science kits that get mailed to you; you can have science fun with stuff you find in your kitchen!

There are tons of fun kitchen science ideas you can find online or in books, but here are some of my favorite experiments for little ones to get you started! The best thing about kitchen science is that it’s so adaptable! You can adjust depending on the level of what your kids can do, and for many of the experiments you can change ingredients depending on what you’ve got lying around in your cupboards. So, shall we get started? Here are five easy and fun kitchen science experiments!

A) Sink or Float with Orange Buoyancy:

Blog_02_02-01.jpeg

Let’s start with a surprisingly fun kitchen experiment where all you need is water and some delicious citrus fruit that’s pretty much a staple in any household with a kid! Get ready to play some ‘sink or float’! This one is great for our smallest friends, because a) it’s water play and b) a clementine/mandarin/orange is involved!

For this experiment, it’s pretty simple: do you think the orange will float in the water? Let your kiddo make a hypothesis (or gnaw on the fruit depending on age) and then put it in a container of water and watch your citrus sail the high seas (or container, whatever). Next, let your little one peel the orange and then put that orange in the water and watch that peeled anchor sink!

“Wait!” your kiddo asks. “What’s the deal with that?!”

“Well,” you say with a knowing smile. “The peel is the orange’s floatie, just like floaties help you swim in the pool. Since we took off the floatie, the orange sinks.”

“Ah, what a wise parent. You know so much,” you wish they would say, but let’s face it, this dialog is fantasy.

Well, you can pretty much stop here, because you have an unpeeled orange, a peeled one, plenty of peelings, and a container of water that your kiddo can play with. But…if you’d like even more of a challenge for older kids, here comes the even more fun experimentation part! Can your kiddo peel *just enough* for buoyancy and gravity to balance somewhere between totally sinking to the bottom and floating at the top? Can your kiddo peel enough for the orange to sink…and then remove some of the orange slices so it floats back up again?

B) Naked Egg & Osmosis

This one is a short and simple experiment with a lot of downtime. First, have your kiddo touch an egg and figure out if it’s hard or soft. Next, leave that egg in a container full of vinegar and watch that calcium carbonate egg shell wither away into nothingness. This is actually interesting to watch as you’ll see bubbles form as that poor shell gets dissolved away. Now, like I wrote earlier, there is a lot of downtime. After your 10 second shell toughness check, you can pretty much stick this back into the fridge for the next 24 hours while the vinegar works it’s magic—um…science.

If all works out well, you’ll have a naked egg with only a membrane surrounding it! If not, change the vinegar solution into a fresh vinegar solution, and cough awkwardly as you put the eggs back into the fridge informing your little one that you’ll need to wait a little bit longer. Back to assuming that all worked out well, this is when you do another hardness test to see that your hard egg has turned into a little softie!

So that’s it, pretty easy! Don’t forget to wash all hands involved since this is a raw egg experiment! You can take this experiment even further (with more downtime) by experimenting with osmosis. You can stick your egg into a cup of corn syrup and see what happens the next day. If you have multiple eggs, stick them in various liquids, and see what happens to each of the eggs. Since you’ve been soaking your eggs in vinegar, that’ll be your control. Can you figure out which liquids make your egg plump up and which ones deflate (tip: distilled water and corn syrup are probably the easiest way to see the biggest difference)?

C) Magic Milk

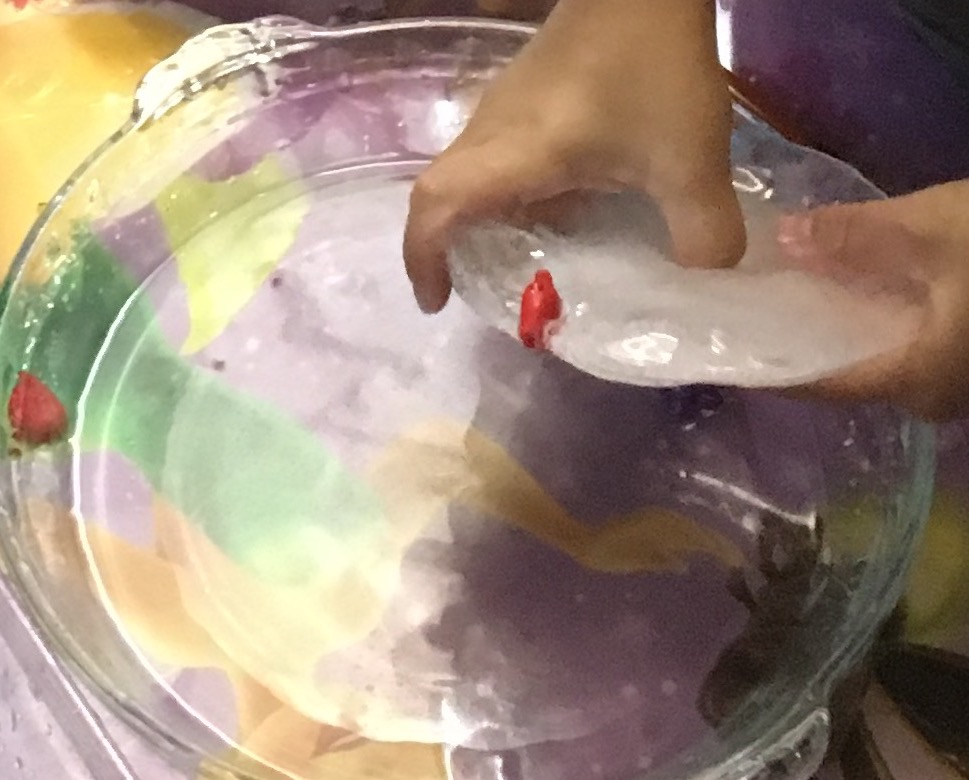
For this dairy experiment, you’ll need milk (the fattier, the better!), food dye, toothpicks, and dish soap. In a wide dish:

Blog_02_02-03.jpeg

1) put a thin layer of milk down,

2) drop a few drops of food dye in different spots,

3) dip a toothpick in some dish soap,

4) put the toothpick in the center of the drops in the milk, and

5) watch those fireworks go!

If you have an older kiddo, this one is great for exercising those fine motor skills, because you need to get the soapy toothpick end in each dot fast! For younger kids who can’t quite do that, even swirling around the toothpick and hitting each dot will be artistic fun! What’s going on here? You’ve got milk fat and soap molecules rushing through the crowd of milk proteins and other stranger molecules to find each other like long lost friends. And there are a LOT of these molecules searching and bonding. At once. Poor food coloring—all it did was get in the way!

D) Ice and Freezing Fun:

Blog_02_02-04.jpeg

Ah, ice. Simple, yet so often overlooked. With melting experiments, you can actually buy yourself time to make dinner. In. Peace. Perfect over the summer, your kiddos can cool down while playing with melting ice. Freeze a block of ice. Supply salt. Supply warm water. Supply cold water. And of course, supply whatever fun supplies you can find in your drawers: medicine droppers, spoons, brushes, straws. Let your kiddos see how their block of ice changes over time as they experiment with what they’re given! For older kiddos who want a challenge, freeze some items like beads (pro tip: freeze in layers so all your beads aren’t at the bottom or top) and have your kiddo rescue the beads with the given supplies! Does the salt help melt the ice? Why isn’t the warm water warm anymore? There are so many fun ways to explore!

Blog_02_02-05.jpeg

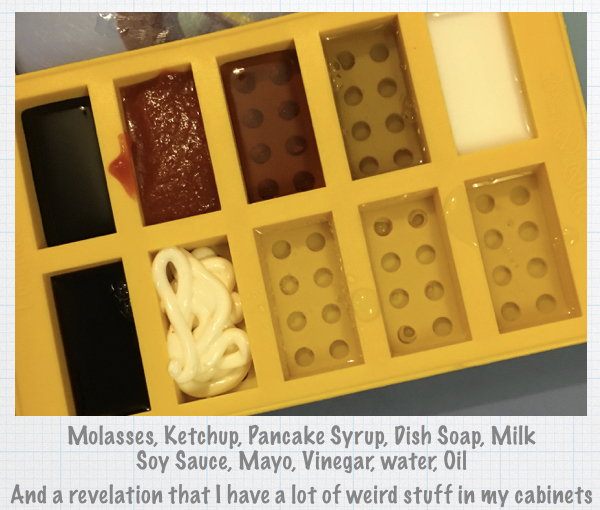
And then if your kiddo is over melting and wants to explore freezing, try a freezing experiment where you try to figure out what liquids freeze first! Your kiddo will get to see how different items freeze at different rates, and you’ll realize you have a lot more liquids in your fridge and pantry than you first thought! If you use a small enough ice tray, you’ll start noticing differences as soon as 15 mins!

E) Wizards Brew

Great for a Halloween themed experiment, you can make Wizard’s Brew or Witch’s Potion (although this is so much fun any time of the year!). Think erupting volcanos. For this one, you’ll need vinegar, baking soda, and dish soap at a minimum. All you need to do is:

Blog_02_02-06.jpeg

1) fill up a container with vinegar,

2) add dish soap,

3) add baking soda, and

4) have fun watching your kiddos laugh!

What’s going on here is that you have the vinegar and baking soda chemically reacting to create Hydrogen Peroxide. When that occurs, Carbon Dioxide gas is formed and gets trapped in the dish soap, making bubbles! Lots. Of. Bubbles! You can add glitter or food coloring for some added fun. You can change the containers and make different effects (you can even use a Jack-O-Lantern during Halloween!).

To get different reactions, you can try changing what liquid soap you use, how much baking soda you add (dump a lot or little sprinkles), stirring the mix (do bubbles form faster?), or drop in different colors of food coloring without mixing and see what colors you get! Even if your kiddo isn’t old enough to understand the chemical reactions going on, they’ll LOVE all the insta-bubbles!

For older kiddos or if you’re ready for more of a challenge, you can add yeast to the mix for a slower reaction that now has an exothermic effect (you’ll feel your container get warmer!). You can learn more about that HERE 

There you have it: five easy kitchen science experiments to get you started! If you have a favorite kitchen science experiment you’d like to share, shout out in the comments below! Feel free to email me at blog@bothellfamilycoop.org as well!

Rainy Season Activities for Kids Who Love Mud

by Julia H.

Hey, I don't know if you had noticed, but we're deep into rainy season, right in the thick of the chilly and drizzly bits, and still relatively short on daylight hours. At this point, I am running out of outside play ideas that are motivating enough for me to want to go outside. The kids are fine, naturally, but since they are still young enough to require some supervision, it helps everyone if I think the outside activities look fun, too. So, here are some ideas I found via the magic of internet search engines for stuff to do outside that sounds awesome:

  • Build a mud castle! Bust out those sand toys and find an awesome muddy spot.
  • Paint with mud. Lucky enough to have a fence? This is a great opportunity to cover it with mud!
  • Make a sculpture out of mud, sticks, rocks, and leaves.
  • Soup/potion-making - all you need is a bucket, a stick, and a good imagination!
  • Comparative Dirt Analysis - look for different types of mud and dirt, collect samples in small containers, and observe the differences and similarities between them.
  • Mud experiments: how long does it take for the mud to dry out? how much water does it take to turn it back into mud?
  • Mud pies - it's a classic, and you can encourage early math learning by sending along real measuring cups and spoons!

What games does your family love to play in the mud? Send us an email and your tips may be included in a future Squeak!

Playing with Your Food

by Florence B.

We’re halfway through November and getting closer to Turkey Day! No wait, I mean Wear-Loose-Clothes-For-Eating Day! Ack, one more try -- I mean Thanksgiving Day! Thanksgiving is all about feeling thankful, but we can’t forget about the food! So, for this mid-month blog post, let’s talk about playing with our food!

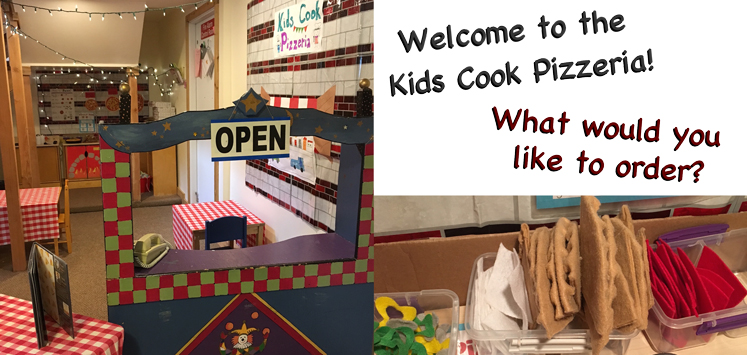
But first, I have to take a quick detour to say how AWESOME the pizza restaurant in the dramatic play area is! Whether you’re a visitor to the blog and have no idea what I’m talking about or a member of the school who has already experienced the awesomeness--I still want to tell you how much I love what the curriculum folks did! If you’re stationed in the upper level, make sure to stop by the dramatic play area, and check out all the little details you can find! I’ve seen home-made felt pieces before, but the school’s set goes beyond and looks like a true labor of love by whomever created the set! Actually, let’s just say that the WHOLE set up and design looks like a labor of love! Thanks, Curriculum Team!

 
Blog05_1_Pizzeria.jpg
 

OK, back to on point, eh?! Yes, yes, we always hear we shouldn’t play with our food, but when you’re an infant/toddler/preschooler (and maaaaaaybe adult, yup), playing with your food is also a potential learning opportunity that’s also mega fun! How? Well, let’s start off with the basics and two simple words: sensory experiences. OK, well maybe not ‘simple’ words since that sounds fancy when all it really boils down to is letting your kiddos discover something new in a preferably (to them) messy way (make sure you know where your vacuum is at all times)! By the way, I’m totally cheating by saying ‘Playing with Your Food’ since I’m really talking about food ingredients, but ‘Playing with Basic Dry Goods and Edible Components You Can Find in Your Kitchen’ just doesn’t have the same ring to it. Anyway, let’s start small and go with simple items for sensory fun before moving up to the big leagues with recipes!

1. Basic Sensory Table Fun!

Ah, let’s start down in Basic-Land. With a simple sensory table, you can let your little ones explore the different textures of basic food ingredients. The nice thing about playing with food stuff is that you don’t have to panic if your little one succeeds in slipping in a taste when you least expect it. Another plus is that you can buy ingredients in bulk, organic, non-GMO, cheap store brand, or any other available combination you want or just raid your own pantry when your kiddos come wandering around while you’re trying to cook a meal. You don’t need a fancy sensory table; you can use large bowls, repurpose a baby tub, dump out a storage bin, or get creative with whatever you can find lying around the house. Some fun ingredients you can experiment are oatmeal, cornmeal, lentils, flaxseed, rice, and popcorn kernels! They’re fairly easy to clean since they’re large enough a broom can sweep away, and a vacuum will happily pick up loose strays for the smaller items.

While exploring different textures works great while our little ones are still...well...little, once they’re bigger/older and out of choking hazard range, you can add treasures for them to discover. Let them explore with measuring spoons and cups making their own recipes while you follow your own and get dinner done! Check out some of the photos below of the sensory table at the school in action!

 
Blog05_2_sensory.jpg
 

2. Chili Beans

This one has to be in a section of its own since I love how uncooked chili beans are a perfect play item in disguise, and you literally don’t have to do anything except open the bag. Inside, you’ll find beans of different colors and sizes; get those little ones to practice their sorting skills! These beans are a great size to practice fine-motor skills, too, as well as being the perfect size for putting in order and counting to practice some math skills! Also, these guys can be used to make shakers for dancing (what little ones doesn’t like to do that?!)!

 
Blog05_3_beans.JPG
 

3. Cloud Dough

Alright, here we go: time for our first official recipe! To make this soft concoction, mix 1 cup of vegetable oil and 8 cups of flour. That’s. It. The hardest part is finding 8 cups of flour, but isn’t that what Costco is for? This stuff is fun, because it can hold shapes if you use a mold and easily crumble with just a tap. Best comparison I can think of is Kinetic Sand, except this one is all natural, way softer, and makes your dry winter hands feel like they just went to a spa! Check out the photo below for some Cloud Dough in action with the disclaimer that this can get messy! Make sure you have some floor protection if you have kiddos who love mess, or do it outside since the oil can make non-carpeted floors slick (and you don’t even want to try to get this out of carpet).

 
Blog05_4_Cloud.JPG
 

4. Oobleck

Now for one of my favorite recipes: Oobleck (isn’t that a fun name?! Thanks, Dr. Seuss--for the name and not the recipe that is!). This one’s also a real challenge of a recipe. Here we go: mix 2 parts cornstarch to 1 part water. Yep. That’s all you need to do in quite possibly one of the COOLEST recipes ever! Once you get past how cool Oobleck is to touch and play with, you can get to the science-y part. You can tell your friends you made a Non-Newtonian liquid, which means whatever you do, don’t pour this down the sink, because it’s not a normal liquid (friends don’t let friends dump Oobleck down the drain!). If you do, you will be telling a plumber how your fancy Non-Newtonian liquid made your clogged sink very Non-Worky. Don’t panic about washing your hands or letting a little bit wash down--just don’t put a lot at one time!

Ha, now with that warning out of the way: this stuff is so cool so MAKE THIS, and let your littles have fun with it! Since it’s just cornstarch and water, for clean up, you can wait for it to dry a bit and scrape it off into the trash or vacuum up when completely dry. You can even make it in a ziploc and have your little one play with it there if you just want to try a small bit to check it out. It really is a crazy liquid since if you apply force (like squeezing into a ball or even poking it) it will harden until you stop and then move like regular liquid again. Seriously, try it! I wish pictures could show how cool it is to play with, but you really need to experience it! Below you can see how you can make an Oobleck ball if you keep pressing it and applying force, but once you stop, it melts back down! You can also play with it by adding more water or cornstarch and seeing what different behaviors you get (warning: nerd blogger alert)!

Blog05_5_Oobleck.jpg

5. Homemade Playdoh

Last, but certainly not least...homemade playdough! For this recipe, I’m going to send you off to another place to get it, but don’t worry, it’s not far; you’ll still be on the school site. Also, here’s a pic of playdough at school! I love glitter in the playdough (ESPECIALLY when it’s not in my home, woohoo!)!

 
Blog05_5_playdough.JPG
 

I bet it’s safe to say I don’t have to explain the playdoh fun factor; it’s fun for any age! Knowing exactly what goes into what your kiddo plays with is a huge relief so enjoy the recipe! As an added plus, it’s a VERY forgiving recipe so let your kiddo help you with the measuring and pouring into the pot. Worse case, if your playdough comes out too sticky, you can have your little ones sprinkle flour and knead until you get the perfect playdough! If too dry, use a dropper and add water drop by drop until it’s juuuuust right! Or if the ACTUAL worst case happens and your playdough is unsavable, then you get the excuse to make the recipe again with your kiddo. Sure, getting playdough is the end goal, but the journey is just as important!

Finally, go ahead and store your playdough in the kitchen with the rest of the playdough toys--and by that, I mean your cooking tools! Cookie cutters are great for cutting out playdough shapes, and that rolling pin you barely use makes a perfect rolling tool for playdough, too! That garlic press is actually a playdough spaghetti maker, and that cheese spreader is a playdough knife! Give your kids some cooking tools, and you’ll be surprised with what they come up with.

 
Blog05_6_tools.JPG
 

So there you have it! I hope you have fun playing with your food aka PwBDGaECYCFiYK (see, it just doesn’t floooow right). If you have other ideas or recipes for sensory play, give a shout out in the comments or email me at blog@bothellfamilycoop.org

Pumpkins, Pumpkins, and More Pumpkins: Tips for the Pumpkin Patch and for Decorating the Pumpkin you Take Home

By Florence B.

It’s October, and we’ve got a great curriculum set up to celebrate the month that’s all about Autumn fun! We’ll be covering Fall (because who can’t help but fall for Fall with all the fun it brings?!), pumpkins, corn, and feelings and emotions. You’ll see our Autumn Home Center set up in the dramatic play area with costumes making an appearance the last week in October (because we can’t have October without some Halloween and make-believe fun!)!

Blog2_01_PumpkinsAtSchool.JPG

Let’s rewind a bit and focus on that second bit of awesomeness I mentioned in the curriculum--pumpkins! Our first excursion is coming up in mid-October! Wait a sec--what’s an excursion? Well it’s one of the fun things that BFCP provides so that members and their children can explore the many fantastic places that the greater Seattle area has to offer! These mini-adventures allow us to learn about our community while strengthening our own community at school, because who doesn’t like to go and learn about new things and visit places with friends?

For those of you not familiar with the classes BFCP has to offer, the parent & baby and toddler classes both go on two excursions each year, the 2/3 class goes on three, the 3/4 class goes on six, and the ever adventurous Pre-K class goes on six to eight a year! For those of you alumni, I’m sure this is one of your favorite things to do in the program; and for those of us new folk, I’m sure it’ll end up being one of our favorites, too!

Well, pumpkins...excursions; I guess it can’t be too hard to guess where the first excursion will take us! We’re heading to a pumpkin farm! Check your class calendar for the date and time for when your specific class is going; each class will be going during their respective class time! For those in the parent & baby class, after we enjoy a picnic lunch at Meadowdale Park, we’ll head to the Fairbanks Animal Farm and Pumpkin Patch! We’ll be able to check out the farm animals as well as take the Hidden Bear Trail to visit Pumpkin Land to find our perfect Fall favorite pumpkin (or gourd if that’s your fancy--they’ll have plenty of those, too)! For the rest of the classes, we’ll head out to the The Farm at Swan’s Trail. We’ll explore some of their 50-acre pumpkin patch, go on wagon hay rides, and check out their Fall Festival Fun event, which includes a fantastic play area as well as farm animals!

Blog2_02_PumpkinPatch.jpg

Here are some handy tips for visiting any kind of pumpkin farm:

1) Have your camera ready at all times, because there’s a good chance your kids will have a blast! You may find your kids pointing at little pumpkins, big pumpkins, different colored pumpkins, and pumpkins that you cannot discern why your kid is pointing at them. BUT, they will have a huge smile on their face so you won’t want to miss that!

Blog2_03_Pointing.JPG

2) Get dressed for mess! Let’s face it; pumpkins don’t grow in nice bins like the grocery store will have us believe. If it’s raining or has rained during any of the days before, there will likely be mud, and no matter your best efforts, that mud will get on you. If you have rain boots, wear them! Depending on the type of pumpkin patch, rain boots may or may not work for your little one. Some places have lots of thick vines on the ground that might be hard to maneuver in the larger rainboot footwear. Be prepared for little feet slipping out of boots, so pack extra socks or even an extra pair of sneakers!

3) Bring large trash bags and a large cardboard box (or something that can stop that round, muddy vegetable from making your trunk look like a mud fight happened and your trunk lost) if you plan on bringing a pumpkin home (and really, who wouldn’t want to take a pumpkin home?). Oh… this we learned the hard way. Once you picked out that once-in-a-lifetime specimen of all-that-is-great-in-the-world-of-pumpkins (at least according to your child), you will have to figure out a way to get said pumpkin home, regardless of how muddy it is and the fact that you just cleaned out your trunk. With. A. Vacuum.

4) If you are terrible at judging size, bring a string to help you take measurements out in the field. Many pumpkin farms have you ‘size’ your pumpkin yourself, meaning they have example pumpkins ordered by size and price so that you can compare the one(s) you find against theirs and figure out how much you owe. If you don’t want a surprise when you go to check out, take a measurement of the pumpkin in your budget beforehand!

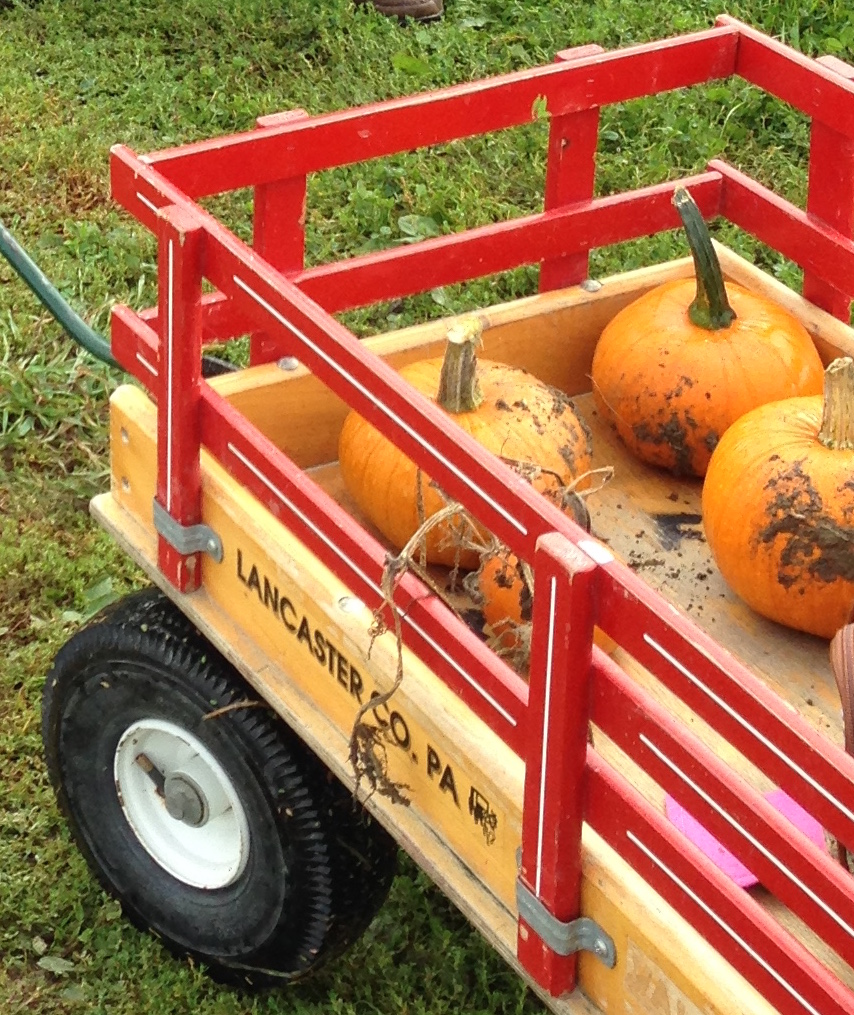
5) Bring a bag! If you’re planning on getting many little pumpkins, consider bringing a very sturdy bag, kind of like those heavier duty reusable shopping bags. While most pumpkin patches have wheelbarrows or wagons to help you lug around your pumpkins, they’re usually limited and are best used when going from the pumpkin patch to your car (trying to maneuver a wheelbarrow in a pumpkin patch is not the easiest thing to do). With the bag, you can place it down when needed (even as a ‘this-is-taken’ sign when placed next to bigger pumpkins you may set aside) and follow your kiddo as they find another amazingly awesome gourd that you must take home!

Blog2_04_wagon.JPG

Alright! So you’ve made it home and you have your pumpkin(s)! Now what? Well, now you can have even more fun! The fun doesn’t end when you leave the excursion! Don’t forget to share what you and your kiddos ended up doing by posting pics in your class Facebook pages! AND if you’re feeling extra proud of your creation, share with the main BFCP Facebook page!

If your infant, toddler, or preschooler doesn’t quite have the dexterity or skill to carve a pumpkin yet, (yes, let’s says it’s because the kids can’t carve, not us) don’t worry; I’ve got some ideas for decorating those pumpkins right here for you!

1) Wait a sec--why do anything at all?! You have an awesome pumpkin (or pumpkins!) that you just spent time picking out with your kiddo. Let that veggie shine in all its natural glory as fall decoration at its best! By the way, pumpkins can last quite a while as long as the skin is solid but degrade rapidly once you carve or break the skin, so keep that in mind if you want your pumpkin greeting your Halloween visitors!

2) Stickers! Who doesn’t love stickers? ‘Tis the season for Halloween stickers so pick some up and have your kiddo go wild! Smaller stickers work better depending on pumpkin curve, so keep that in mind! You can also find some “googly eye” stickers to bring your pumpkin to life! If you’re planning on showing your new work of adhesive art outside, plastic-based or foam stickers work great so they won’t get ruined by moisture like the paper ones!

Blog2_05_stickers.JPG

3) Markers! If you’re not quite at the point of handing your kiddo a Sharpie and hoping for the best, go with good old washable markers! When your kiddo is done making their masterpiece, you can trace over the art with permanent markers to make their design ‘pop’! OR...spray with a sealant and call it a day!

4) Paint! Grab a smock, put on some old clothes, and take the acrylic paints off the highest shelf you have, because painting a pumpkin is a great way to let your little budding artist shine! For a 3D effect, look no further than puffy paint for a one-step colored 3D effect or tacky glue as your 3D design primer before painting.

Blog2_06_painting.JPG

5) Paint...WITH glue and glitter! If you’re brave and entrusted with the mightiest of vacuums, grab some clear-dry glue, food dye (or watercolor), and bottles of glitter (also sequins, bits of tissue paper...you get the idea!). Water down the glue a bit (not too much!) to make it easier to paint (or use as is), and then sprinkle your glitter after painting. Add the dyes to the glue if you want more color! If you use washable glue or tissue paper, make sure to use a sealant before placing outside! Tip: if it looks like a fairy stopped by and left an explosion of pixie dust at your house, you can use contact paper, lint removers, or plain tape to pick up strays that your vacuum rejects!

6) Crayon drip! So you know all those broken crayons that can’t be used for coloring any more (at least according to your child) or that stash of freebie crayons you keep getting from restaurants in the same three colors? Never fear, those crayons are the stars of this idea! Arm yourself with some glue, a hair dryer, and aforementioned crayons, and you’ve got yourself the makings of a fun and unique way to decorate! Glue (tacky glue is great) your peeled crayon bits at the top of the pumpkin, let the hair dryer melt them, and then have gravity do the rest! You can keep adding more layers, so keep going!

7) Carve! Yes, I have to include this Halloween staple even though this is a “list of ideas if you don’t want to carve your pumpkin” (details, meh)! As you lament your artistic ability, remember it’s all about the journey for you and your kiddo, not the destination. No matter the age, taking out the pumpkin innards is a messy blast! Younger kids can enjoy the sensory adventure as they investigate the pumpkin seeds and pulp. Try to pick out the seeds and put them in a cup, use a spoon to mix, smear the pulp around--there’s so for these investigators to do! Once you pick out a design for your pumpkin, your kiddo can help transfer it over. You can use contact paper to draw directly on the pumpkin and have your kiddo poke or trace the lines of your design onto the pumpkin. They just need to bruise the skin a little for you to see the design when you take the contact paper off. Any pieces you remove from the pumpkin as you carve goes straight to your kids to explore. Cut a hole through and remove a big chunk; investigate the difference between the tough pumpkin skin, the soft inner flesh, and the slimy pulp. Chip away at the skin for your design and show the color differences between skin and pumpkin flesh. When you’re done and drop a light inside, show the differences with the carved sections versus the skin. What about the areas that were carved deeper? What about the hole you cut through?

Blog2_07_carving.JPG

Well, there you have it for this week’s post about pumpkins! Sound off in the comments if you have any tips or ideas about pumpkins to share! If you have feedback or ideas you’d like to see featured in future blog articles, send me an email at blog@bothellfamilycoop.org.

Community Apple Pickin’

On Tuesday Sept. 29th our 3/4’s and Pre-K classes went on a field trip to visit our neighbor Kory Schue’s home and do some good ole fashioned apple pickin’. After walking 2-3 blocks hand in hand we arrived at her beautiful garden adorned with fusion glass art depicting dragonflies, peacocks, suns, and much more.

Read more